
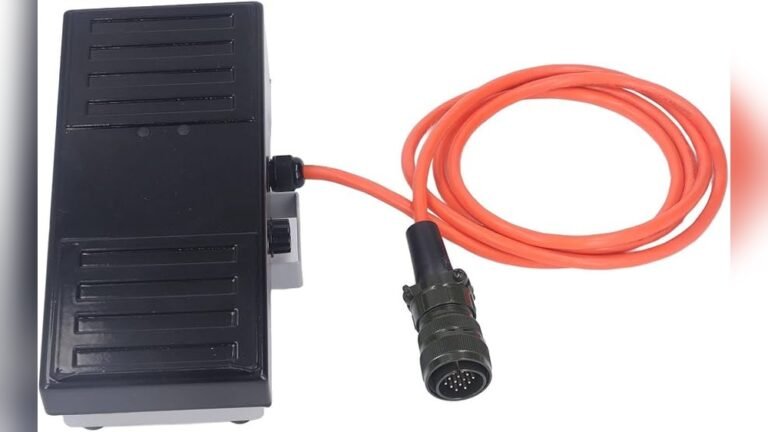
Understanding The 14-pin Tig Pedal: Your Foot’s Control Over Welding Precision
For many welders, the TIG (Tungsten Inert Gas) welding process offers unparalleled control and the ability to create beautiful, precise welds. While the torch and filler rod are key, the foot pedal is often the unsung hero, acting as the direct interface between the welder’s intent and the machine’s output. Among the various types of TIG pedals, the 14-pin connector is a common standard found on many professional-grade welding machines. Understanding what this pedal does, how it works, and why it’s important can significantly elevate your welding game.
A 14-pin TIG pedal is essentially a variable resistor controlled by your foot. As you press down, the resistance changes, signaling the welding machine to adjust the amperage (the amount of electrical current). This allows you to dynamically control the heat input to your workpiece, which is crucial for TIG welding. You can start with a low amperage to initiate the arc, increase it to melt the base metal and add filler, and then decrease it to feather the puddle as you finish the weld. This level of control is what allows for intricate work on thin materials or precise build-ups.
How The 14-pin Tig Pedal Works
The magic happens inside the pedal and through the 14-pin connector. The pedal houses a potentiometer, a variable resistor. When you press the pedal, a mechanism moves a wiper across the resistive element, changing the electrical resistance. This change in resistance is sent to the welding machine via the 14-pin cable. The machine interprets these signals and adjusts the output current accordingly.
The 14-pin connector itself is a multi-pin interface that allows for more than just amperage control. It can also transmit signals for torch switch activation (turning the gas flow and arc on/off) and sometimes even water cooler control for advanced setups. The variety of pins allows for a comprehensive connection, consolidating multiple functions into a single, robust cable.
Key Features And Benefits
The primary benefit of a 14-pin TIG pedal is the fine-tuned control over amperage. This is essential for:
- Starting the arc: Gently initiating the arc without blowing through thin materials.
- Managing the weld puddle: Adjusting heat on the fly to maintain the perfect size and shape of the molten pool.
- Adding filler material: Precisely controlling the melt rate of the base metal when adding filler.
- Finishing the weld: Tapering off the amperage to avoid craters at the end of a bead.
Beyond amperage, many 14-pin pedals offer additional features. Some have a toe tap switch for turning the gas on and off, or a detent for a set amperage that you can engage with a click of your heel. The robust construction of these pedals also means they are built to withstand the rigors of a workshop or job site.
Types Of 14-pin Tig Pedals
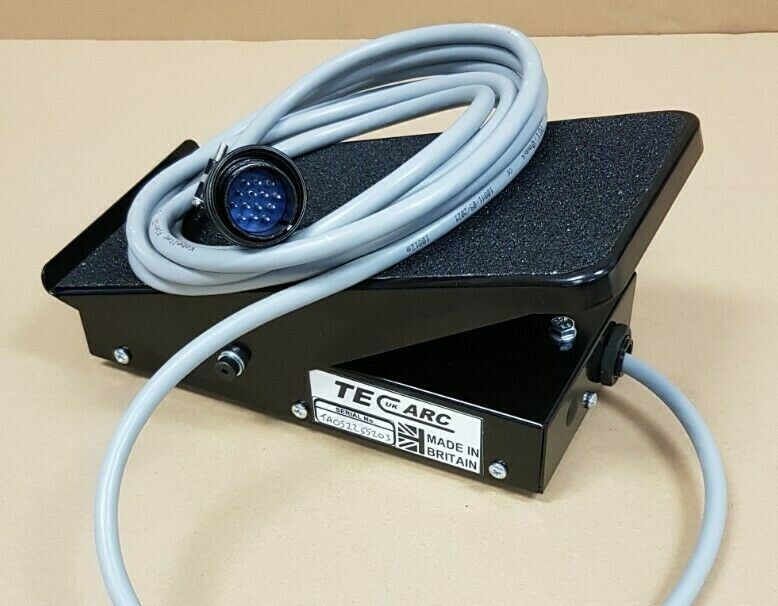
While the 14-pin connector is standard, the pedals themselves can vary. Most are designed for constant current (CC) welding machines. You’ll find pedals made from durable materials like steel or heavy-duty plastic, with different pedal shapes and surface textures for comfort and grip. Some higher-end models might include additional features like a pre-flow gas adjustment or even programmable amperage settings.
Connecting Your 14-pin Tig Pedal
Connecting a 14-pin pedal is usually straightforward. The connector is designed to mate only one way, preventing incorrect insertion. Simply align the keyed connector on the pedal’s cable with the corresponding socket on your TIG welding machine and push it in until it clicks or locks securely. Ensure the machine is powered off before making or breaking the connection to avoid electrical damage.
Maintenance And Care
To ensure your 14-pin TIG pedal lasts a long time and functions reliably, a little maintenance goes a long way.
Regular Cleaning
Keep the pedal free from dust, grinding debris, and oil. Wipe it down with a dry or slightly damp cloth periodically. Pay special attention to the foot contact area to ensure good grip and prevent slipping.
Cable Inspection
Inspect the cable and connector for any signs of damage, such as cuts, frays, or bent pins. A damaged cable can lead to intermittent connections or complete failure. If you notice any issues, the cable may need to be replaced by a qualified technician.
Mechanical Check
Periodically check that the pedal mechanism moves smoothly. If it feels stiff or sticky, a light application of a dry lubricant (like silicone spray) on the pivot points might help, but avoid over-lubricating, which can attract dirt.

Credit: www.amazon.com
Common Issues And Troubleshooting
Even with good care, problems can arise. Here are a few common issues and how to address them.
No Amperage Control
- Check the connection: Ensure the 14-pin connector is fully seated on the welding machine.
- Inspect the cable: Look for any visible damage to the cable or connector pins.
- Test the pedal: If possible, try the pedal on another compatible machine, or try a known working pedal on your machine. This helps isolate whether the issue is with the pedal or the machine.
Intermittent Amperage
- Worn potentiometer: The internal resistor can wear out over time, causing erratic readings. This often requires pedal replacement.
- Loose internal wiring: If the pedal has been dropped or subjected to rough handling, internal wires might have become loose.
Toe Tap Switch Not Working
- Check for debris: The switch mechanism might be blocked by dirt or debris.
- Internal switch failure: Like any mechanical switch, it can fail over time.
Choosing The Right 14-pin Tig Pedal
When selecting a 14-pin TIG pedal, consider these factors:
Durability And Build Quality
A pedal that will be used frequently or in harsh environments needs to be robust. Look for heavy-duty construction, often made from steel, with a non-slip surface.
Ergonomics And Comfort
You’ll be using your foot for extended periods, so comfort is key. Consider the shape of the pedal, the range of motion, and the feel of the resistance. Some pedals are designed with a lower profile, while others offer more pronounced contours for better foot positioning.
Brand Reputation And Reviews
Research different brands and read reviews from other welders. Established brands often offer better quality control and customer support.
Compatibility
Always ensure the pedal is compatible with your specific TIG welding machine model. While 14-pin is a standard, some machines may have proprietary variations or specific requirements. Check your machine’s manual or the manufacturer’s website.

Credit: www.amazon.com
Advanced Features To Consider
Some 14-pin pedals go beyond basic amperage control. These can include:
- Adjustable Amperage Range: Some pedals allow you to set a maximum amperage limit, preventing accidental high-current welds.
- Foot Switch for Gas/Coolant: A separate switch, often a toe tap, can control gas flow or coolant systems, offering more hands-free operation.
- Programmable Settings: Higher-end pedals might integrate with the welding machine’s controls to allow for programmable start/end amps, slope settings, or even pulse parameters.
The Importance Of A Good Pedal In Tig Welding
In my experience, a high-quality TIG pedal is one of the most impactful upgrades you can make to your welding setup, especially for intricate work. It’s not just about controlling heat; it’s about the tactile feedback and the direct connection to the arc. A responsive pedal allows you to “feel” the weld puddle through the torch, enabling adjustments that are almost intuitive. This level of control is paramount for achieving professional-looking welds consistently.
Credit: www.ebay.com