
If you’ve ever looked at your MIG welds and thought, “Why do they look so bad?”, you’re not alone. Many beginners struggle with messy, uneven, or weak welds. But even experienced welders can face problems when conditions change. Learning the cause of bad welds is the first step to improvement. This guide will help you spot mistakes, explain key factors, and show how to get cleaner, stronger results.
Common Reasons Mig Welds Look Bad
Understanding why your welds don’t look right is crucial. Here are the most frequent causes:
1. Incorrect Settings
The wrong voltage, wire speed, or amperage will ruin your weld. For example, too much voltage causes a wide, flat bead. Too little gives you a tall, narrow bead. If the wire speed is too high, you’ll see spatter and uneven lines.
Too slow, and the arc breaks, causing weak joints.
2. Poor Technique
Moving the gun too quickly creates thin, inconsistent beads. If you go too slow, the weld builds up and gets lumpy. The angle matters, too. A steep angle gives poor penetration and makes the bead appear messy.
3. Dirty Metal
Rust, oil, paint, or dirt prevent a clean weld. The arc can’t bond well, so the weld looks porous and weak.
4. Bad Gas Coverage
Shielding gas is vital. Without enough coverage, your weld will be full of holes (porosity). Wind, leaks, or wrong gas flow cause this problem.
5. Wrong Wire Type Or Size
Using the wrong wire for your metal type leads to weak welds. The size matters too; bigger wire needs more power, and too small wire can’t fill the joint properly.
How To Diagnose Mig Weld Problems
To fix your welds, you need to know what’s wrong. Look for these signs:
- Spatter: Tiny metal drops scattered around the weld. Often caused by high wire speed or dirty metal.
- Porosity: Small holes in the bead. Usually from poor gas coverage or dirty surfaces.
- Cracks: Lines running through the weld. Can be from low voltage or wrong wire.
- Undercut: Deep groove next to the weld. Often from high voltage or moving the gun too fast.
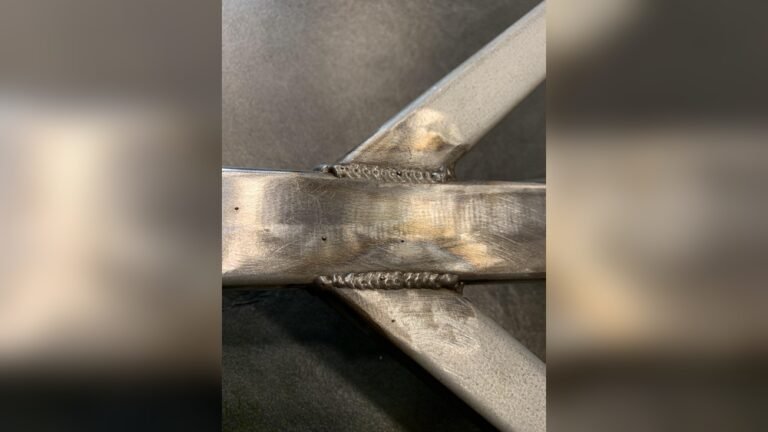
Compare these common weld problems:
| Problem | How It Looks | Main Cause |
|---|---|---|
| Spatter | Metal dots around bead | High wire speed, dirty metal |
| Porosity | Small holes in weld | Poor gas coverage, dirty metal |
| Cracks | Lines in weld bead | Low voltage, wrong wire |
| Undercut | Groove beside weld | High voltage, fast gun movement |
Credit: www.reddit.com
Fixing Your Mig Welds: Practical Tips
Clean, strong welds are possible if you follow these tips:
1. Set The Right Parameters
Check your machine’s chart for recommended voltage and wire speed. Adjust based on metal thickness. For example, on 1/8″ steel, use 18-20 volts and 220-300 inches/min wire speed.
2. Clean The Metal Well
Use a wire brush or grinder to remove rust, paint, and oil. Even small amounts of dirt can make a big difference.
3. Check Gas Flow
Make sure your flow rate is 20-25 CFH (cubic feet per hour). Too much gas causes turbulence; too little means poor coverage. Shielding gas is usually argon/CO2 mix. For outdoor work, use higher flow or wind shields.
4. Use The Correct Technique
Hold the gun at a 10-15° angle, pointing in the direction of travel. Move steadily, not too fast or slow. Practice on scrap metal to get a feel.
5. Choose The Right Wire
For mild steel, use ER70S-6 wire. Size matters: .030″ is good for thin metal, .035″ for thicker. Always match wire to your project.
Real-life Examples: How Adjustments Improve Welds
Let’s look at two welders and their results:
| Welder | Problem | Adjustment | Result |
|---|---|---|---|
| Mike | Porosity | Increased gas flow, cleaned metal | Smooth, solid bead |
| Sara | Spatter | Lowered wire speed, adjusted voltage | Clean, neat weld |
Notice how simple changes can create much better results.

Credit: www.reddit.com
Non-obvious Insights For Beginners
1. Listen To The Arc
A good MIG weld sounds like frying bacon. If it’s popping or hissing, your settings need adjusting. This sound check is faster than just looking.
2. Practice Gun Control
Many beginners forget to keep the gun steady. Even small shakes change the bead shape. Use both hands or rest your arm for more control.
Avoiding Common Mistakes
- Don’t weld on metal with hidden moisture; it causes porosity.
- Never guess settings. Always check the manual or machine chart.
- Don’t ignore gas leaks. Even tiny leaks ruin weld quality.
Comparing Mig To Other Welding Methods
MIG welding is popular for ease and speed, but has limits. Here’s a quick comparison:
| Method | Ease of Use | Typical Weld Quality |
|---|---|---|
| MIG | Easy | Good, if setup right |
| TIG | Hard | Excellent |
| Stick | Medium | Varies |
MIG is best for quick jobs and beginners, but TIG gives cleaner results for advanced users.
Final Thoughts
Bad-looking MIG welds can be fixed. Most problems come from wrong settings, poor technique, or dirty metal. With careful preparation and a few changes, your welds can go from ugly to strong and neat. Pay attention to details, listen to the arc, and always keep your materials clean. If you want deep technical details, you can check resources like American Welding Society.

Credit: www.reddit.com
Frequently Asked Questions
Why Does My Mig Weld Have Holes?
Holes (porosity) are usually caused by poor gas coverage or dirty metal. Clean your material and check your gas flow.
What Wire Size Should I Use For Mig Welding?
For thin metal,. 030″ wire is best. For thicker steel, use. 035″ wire. Always match wire size to your project.
How Do I Prevent Spatter?
Lower your wire speed, clean the surface, and adjust voltage. Spatter often comes from high wire speed or dirty materials.
Can I Weld Outside With Mig?
Yes, but wind can blow away shielding gas. Use higher gas flow or wind shields, and try to weld on calm days.
What Is The Best Gas For Mig Welding Steel?
A mix of argon and CO2 is most common for mild steel. Pure CO2 is cheaper but gives more spatter.
With the right setup and careful technique, you’ll soon see better results with your MIG welds. Practice, pay attention, and your welds will improve quickly.