Anyone interested in electronics knows that a good soldering iron kit makes a big difference. The Tabiger Soldering Iron Kit is popular for beginners and DIY fans. It’s affordable, packed with tools, and simple to use—even if you’re new to soldering. If you want to repair gadgets, build projects, or learn a new skill, this guide will show you how to use every part of the Tabiger kit safely and effectively. You’ll learn everything from setting up your workstation to making clean, reliable solder joints.
What’s In The Tabiger Soldering Iron Kit?
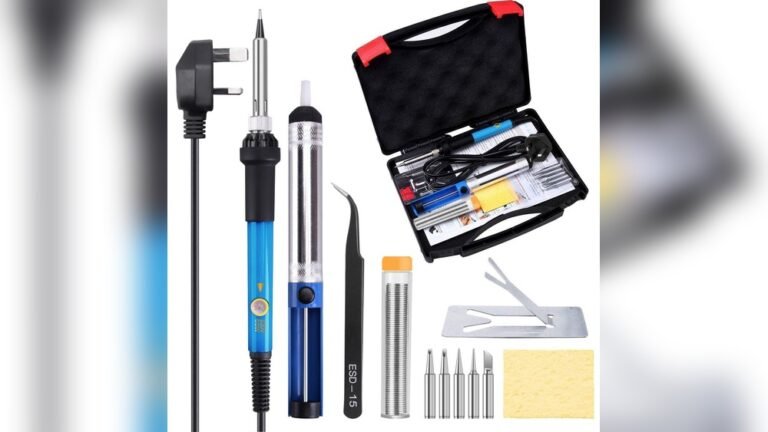
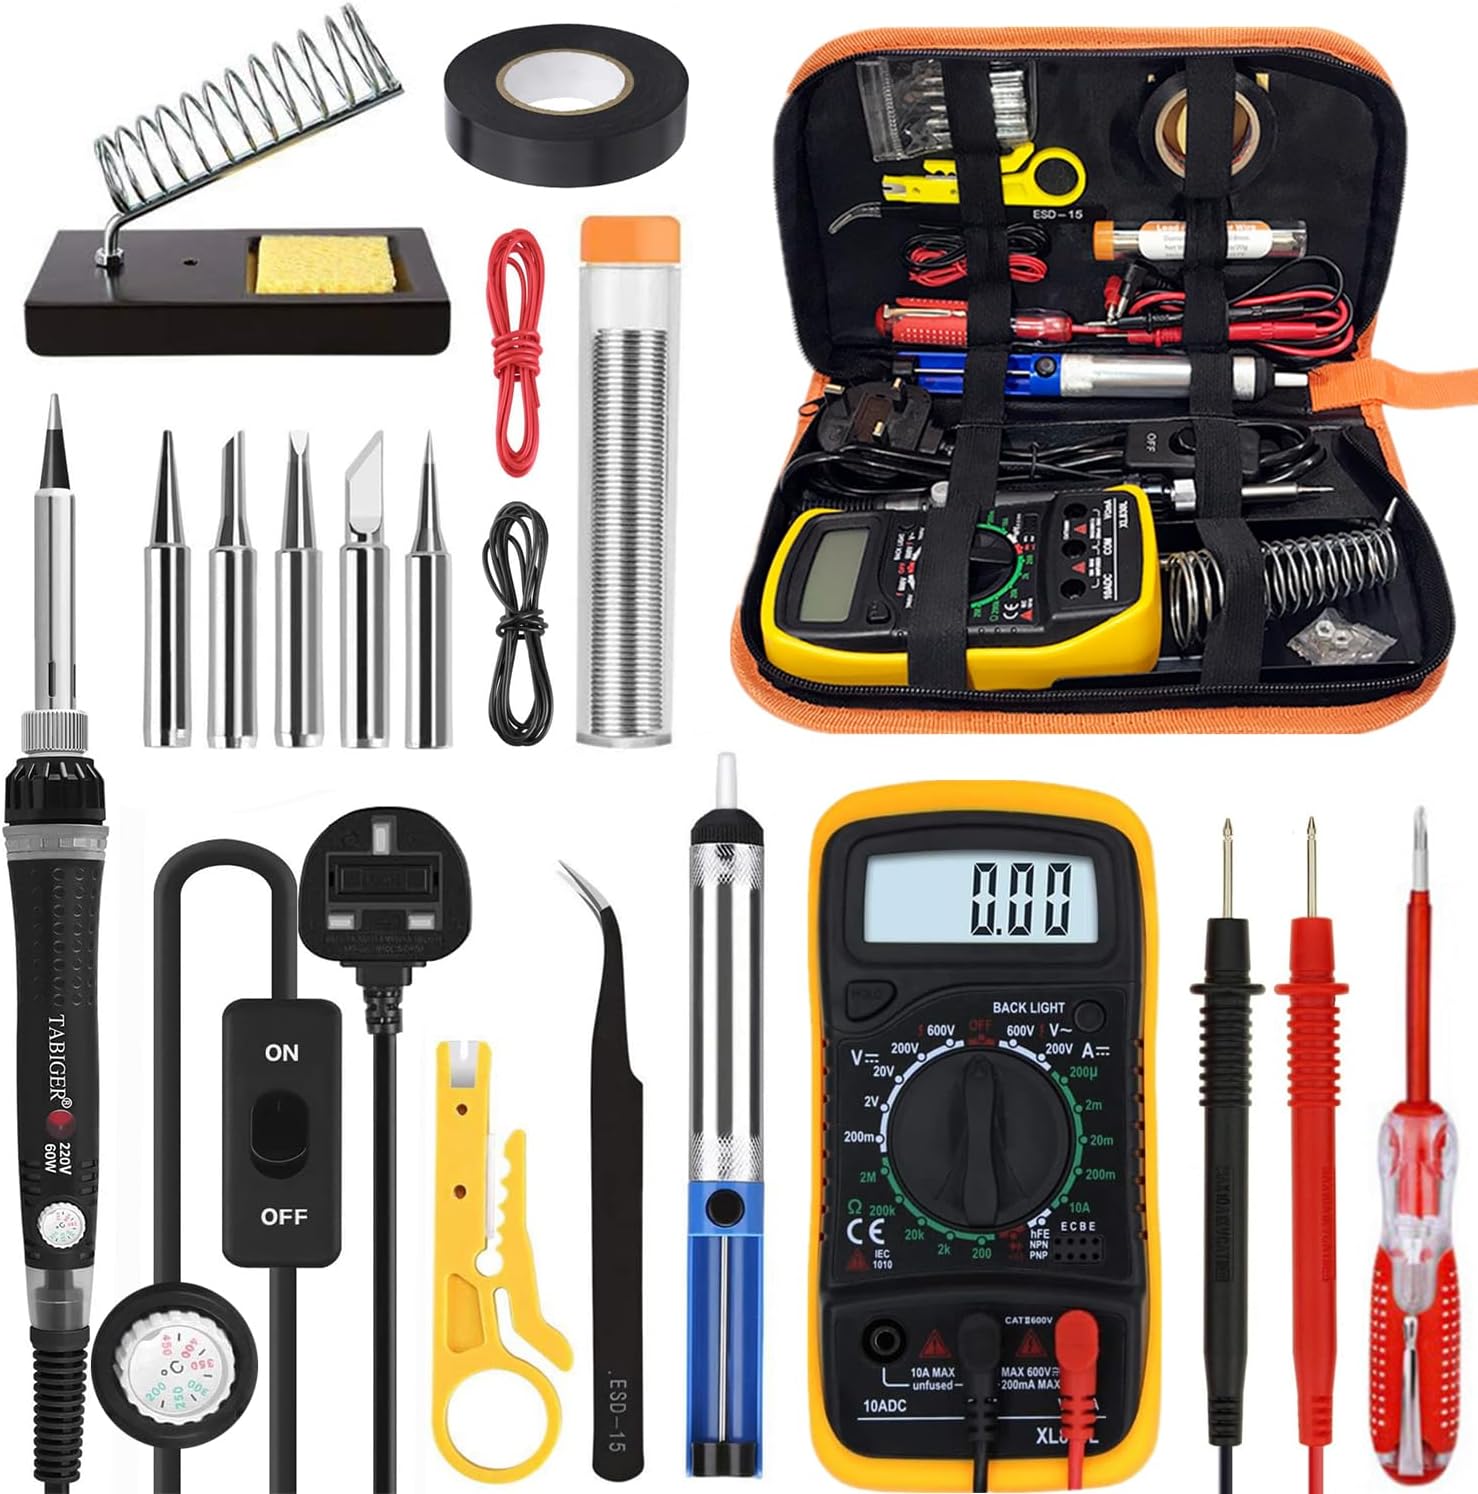
Before you start, it’s important to know what tools you have. The Tabiger Soldering Iron Kit usually includes:
- Adjustable temperature soldering iron (60W)
- 5 extra soldering tips (for different jobs)
- Solder wire (for making connections)
- Desoldering pump (to remove solder)
- Anti-static tweezers
- Soldering iron stand with cleaning sponge
- Wire stripper/cutter
- Small screwdriver
- Carrying case
Some kits may have extras like a multimeter or mini PCB. Always check the kit list before starting.
Setting Up Your Work Area
A good setup is key for safety and quality work. Here’s how to get ready:
- Choose a well-ventilated space. Soldering creates fumes that you should not breathe in. Open a window or use a fan.
- Work on a heat-resistant surface. A silicone mat or ceramic tile works well. Avoid plastic or paper.
- Keep tools within reach. Place the iron stand, solder wire, and desoldering pump near your dominant hand.
- Plug in the soldering iron. Most Tabiger irons use a standard outlet. Check for damage on the cord before use.
- Set the temperature. For most jobs, 350–400°C (660–750°F) works best. Lower temperatures can cause poor joints; higher can damage parts.
Credit: www.dxbrunners.com
How To Solder With The Tabiger Kit
Soldering means joining two metal parts with melted solder. Here’s a simple step-by-step method for beginners:
- Prepare the parts. Clean the metal leads and pads with the included tweezers or a small brush. Dirty parts make bad connections.
- Select a tip. Use a pointed tip for small electronics, or a chisel tip for larger wires.
- Heat the joint. Touch the soldering iron tip to both the wire and pad for 1–2 seconds.
- Feed the solder. Touch solder wire to the joint, not the iron. The solder should melt and flow around the parts.
- Remove the iron. Take away the iron and let the joint cool naturally.
- Check your work. A good joint is shiny and shaped like a small volcano. Dull or ball-shaped joints are weak.
Common Soldering Mistakes
- Using too little heat causes cold joints, which fail easily.
- Moving the parts before the solder cools causes cracks.
- Using too much solder makes messy blobs and short circuits.
Using Other Kit Tools
The Tabiger kit offers more than just the soldering iron. Here’s how to use the other tools:
Desoldering Pump
Mistakes happen. To remove excess solder:
- Heat the joint until the solder melts.
- Press the pump’s plunger down.
- Place the pump tip over the melted solder and release.
- Repeat if needed. Clean the pump after use.
Wire Stripper/cutter
This tool removes the plastic cover from wires:
- Choose the right slot for your wire size.
- Squeeze and pull off the insulation.
- Use the cutter to trim wires to length.
Soldering Stand And Cleaning Sponge
Always place the hot iron in the stand. Moisten the cleaning sponge and wipe the tip often. A clean tip gives better results and lasts longer.
Tweezers
Use anti-static tweezers to handle small components, especially sensitive chips or wires. This prevents damage from static electricity.
Credit: www.tomshardware.com
Comparing Tabiger With Other Soldering Kits
A lot of people wonder how the Tabiger kit matches up with other budget options. Here’s a quick comparison:
| Feature | Tabiger Kit | Vastar Kit | X-Tronic Kit |
|---|---|---|---|
| Price | Low | Low | Medium |
| Adjustable Temp | Yes | Yes | Yes |
| Accessories | Many | Few | Many |
| Case Quality | Good | Basic | Excellent |
The Tabiger kit stands out for its balance of price and accessories, making it a strong choice for hobbyists and new users.
Cleaning And Maintenance Tips
A well-maintained soldering iron works better and lasts longer. Here are some tips:
- Clean the tip after each use with the damp sponge.
- Tin the tip: Melt a little solder on the tip before storing. This prevents rust.
- Unplug after use: Never leave the iron on when not working.
- Empty the desoldering pump: Remove solder from inside after each session.
Safety When Using The Tabiger Kit
Soldering is safe if you follow some basic rules:
- Never touch the metal parts when the iron is on. It can reach over 400°C.
- Wash hands after handling solder. Some solder contains lead, which is toxic.
- Wear safety glasses to protect your eyes from hot solder or wire trimmings.
- Keep the kit away from children. Store it in the included case after work.
Troubleshooting Common Problems
Even with a good kit, issues can come up. Here are solutions to common problems:
| Problem | Possible Cause | Solution |
|---|---|---|
| Iron won’t heat | Loose plug or broken cord | Check connections, try another outlet |
| Tip is black or rough | Oxidation | Clean with sponge, re-tin tip |
| Solder doesn’t stick | Dirty parts or low heat | Clean parts, raise temperature |
| Strong odor/fumes | Poor ventilation | Open window, use fan |

Credit: www.amazon.ae
Practical Tips For Beginners
- Practice on spare wires before working on real circuits.
- Use the smallest tip for circuit boards, larger tips for thick wires.
- Keep your workspace organized to avoid accidents.
- Change tips only when the iron is cool.
One insight many beginners miss: solder flows toward heat. Always heat both parts you want to join, not just one. Also, many forget to clean the tip often—this tiny habit helps you avoid many soldering problems.
Where To Find More Resources
If you want to learn more about soldering, check out guides from Adafruit. Their tutorials are clear and beginner-friendly.
Frequently Asked Questions
How Long Does The Tabiger Soldering Iron Take To Heat Up?
It usually heats up in 2–4 minutes. The LED indicator shows when it’s ready.
Can I Use The Tabiger Kit For Jewelry Or Stained Glass?
This kit is designed for electronics. For jewelry or glass, you need a higher-power iron.
Is The Solder In The Kit Lead-free?
Some kits include leaded solder, others use lead-free. Check the package or buy extra lead-free solder if you prefer.
What Is The Best Temperature For Soldering Electronics?
For most electronics, 350–400°C (660–750°F) works best. Lower temperatures can cause weak joints.
How Do I Store The Soldering Iron After Use?
Let it cool fully, wipe the tip, and place it in the case. Avoid wrapping the cord tightly.
Learning to use the Tabiger Soldering Iron Kit is a smart step for any electronics hobbyist. With practice and care, you’ll be able to fix, build, and explore new projects safely and confidently.