
Making your own leather welding apron is a smart way to stay safe, save money, and get a custom fit for your body. Leather protects against sparks, heat, and sharp objects, making it the top choice for welders everywhere. If you’ve ever struggled to find an apron that fits well, or you want a project that’s both practical and rewarding, this guide is for you.
What You’ll Need
Before you start, gather all the necessary materials and tools. Working with leather is easier if you plan ahead.
Materials:
- One piece of sturdy cowhide or split leather (about 24″x36″ for a standard size)
- Two leather straps (1″ wide, 24″ long each)
- Heavy-duty thread or leather lacing
- Buckles or snap fasteners (optional)
Tools:
- Sharp utility knife or rotary cutter
- Leather punch set
- Ruler or measuring tape
- Awl or sharp nail for marking
- Heavy-duty needle (for hand sewing) or sewing machine capable of handling leather
- Cutting mat (recommended)
- Pencil or chalk for marking
Many beginners forget that quality leather makes a big difference. Cheaper leather may tear or burn easily, so always choose material designed for welding protection.
Measuring And Cutting The Leather
Getting the right size is key to both comfort and safety. Standard welding aprons cover from the chest to just below the knees.
- Lay your leather flat on a clean surface.
- Use your measuring tape to mark a rectangle about 24″ wide by 36″ long.
- With chalk or pencil, outline the apron shape. You can curve the top edges for the chest and slightly taper the sides for a better fit.
- Cut the leather carefully with your utility knife or rotary cutter.
To help you choose the right thickness, here’s a quick comparison:
| Leather Weight | Thickness | Best For |
|---|---|---|
| 4-5 oz | 1.6-2.0 mm | Light-duty work |
| 6-7 oz | 2.4-2.8 mm | General welding |
| 8-10 oz | 3.2-4.0 mm | Heavy-duty welding |
Most welders choose 6-7 oz leather for the right balance of protection and flexibility.
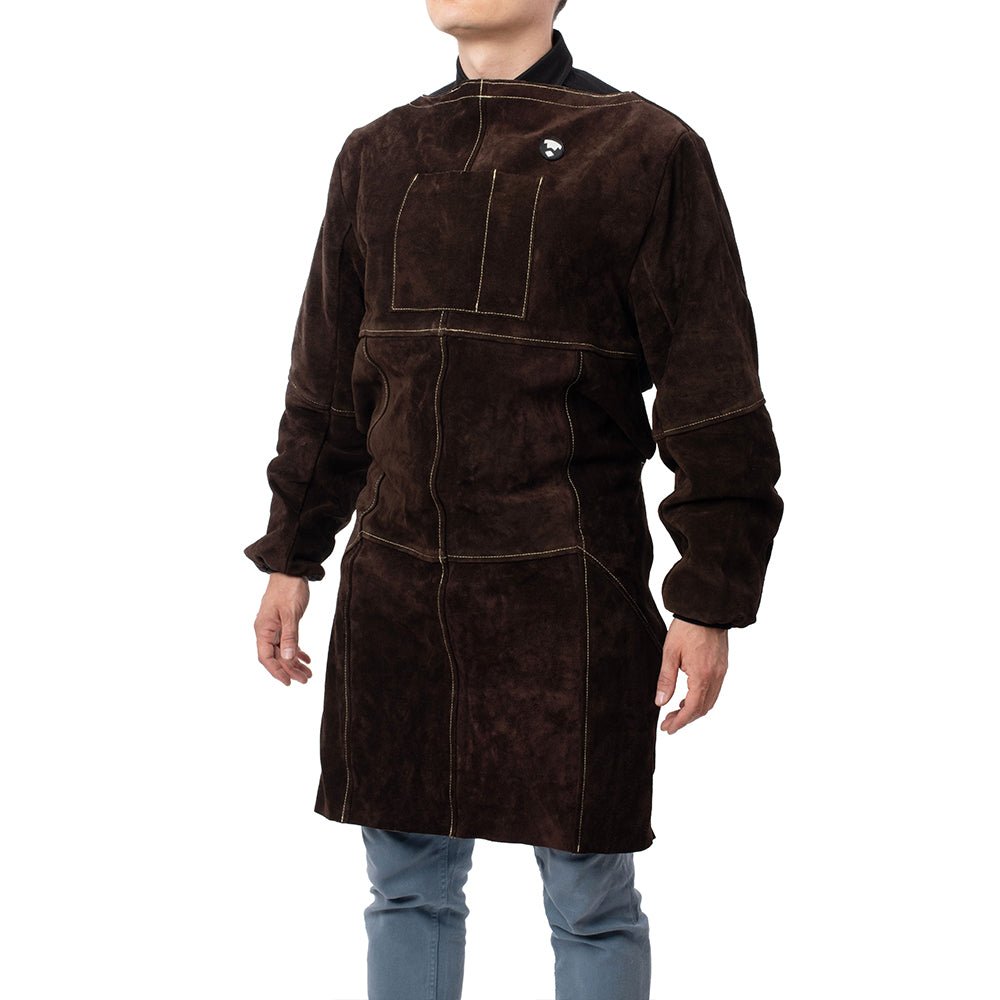
Credit: webshop.waylanderwelding.com
Shaping The Apron
A good fit means better coverage and more comfort during long welding sessions.
- Curve the top corners using a bowl as a guide.
- If you prefer, cut slight angles near the waist for a tailored look.
- Double-check that the apron covers your chest and extends below your knees.
Mark and trim as needed. Don’t rush this part—once you cut, you can’t add leather back!
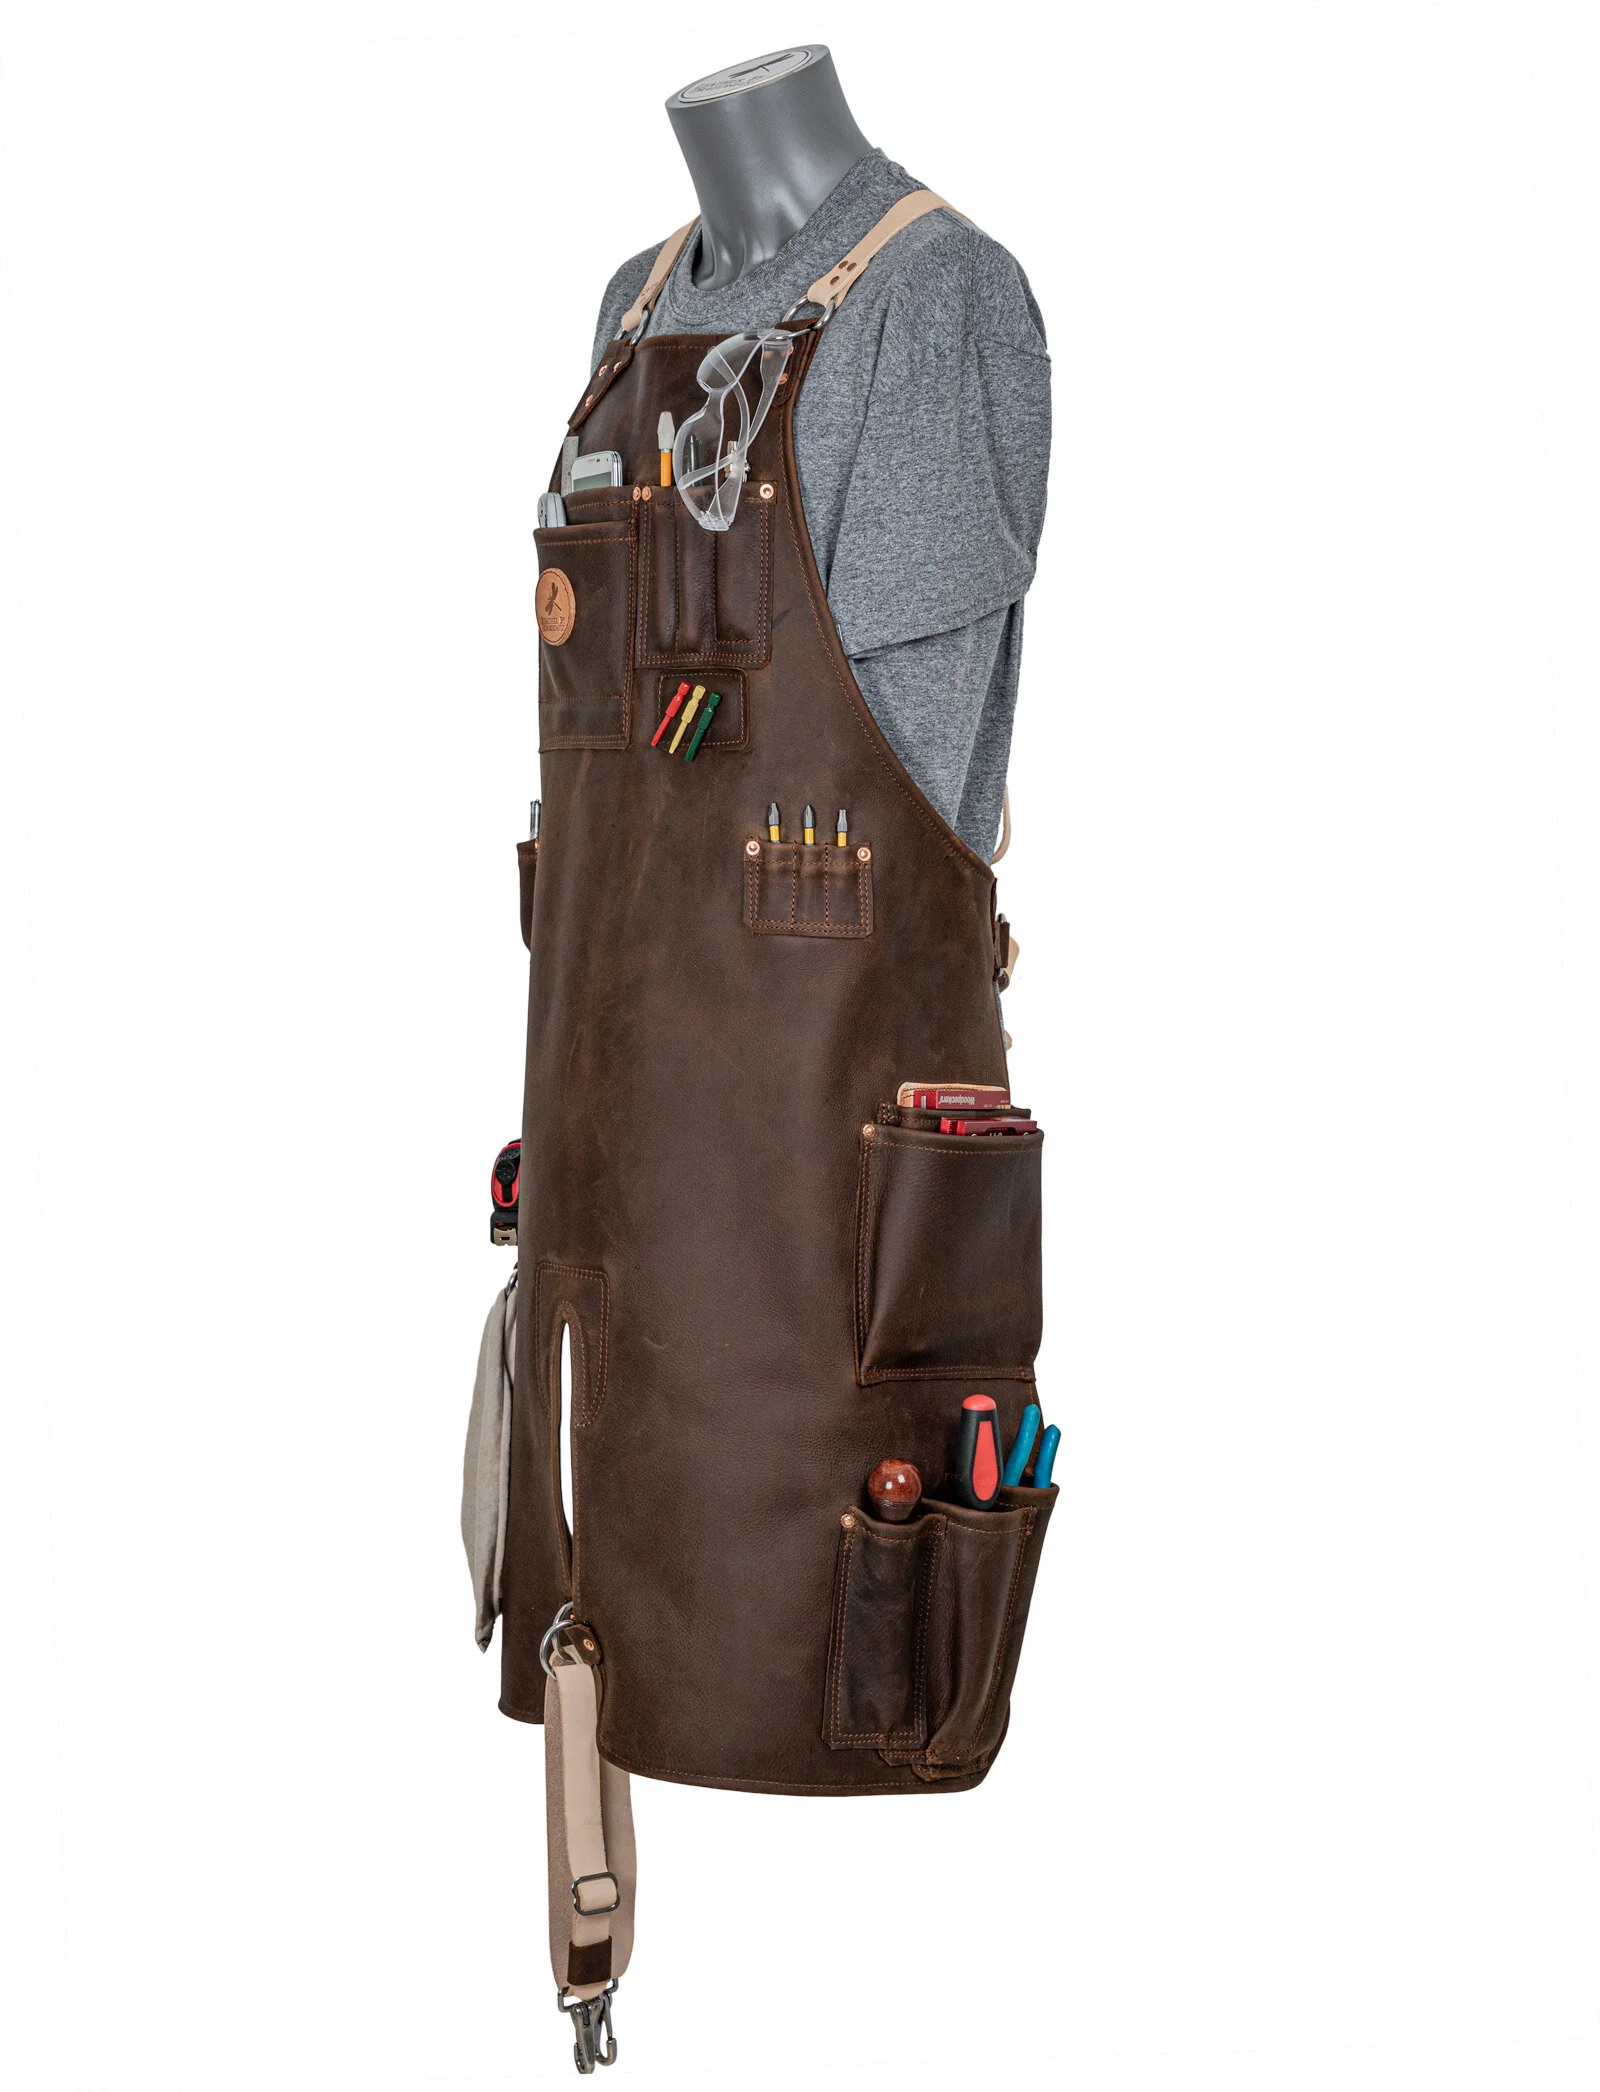
Adding Straps And Fasteners
Straps keep your apron in place. There are several ways to attach them, but strong, adjustable straps are best.
- Punch holes near the top edges for neck straps and on each side near the waist for side straps.
- Thread the leather straps through the holes. Secure with sturdy knots or rivets.
- For easy wearing, attach buckles or snap fasteners to the ends of the straps.
Here’s a quick look at common fastening options:
| Fastener Type | Adjustment | Durability |
|---|---|---|
| Buckle | High | Very durable |
| Snap fastener | Medium | Good |
| Simple knot | Low | Depends on leather |
If you’re left-handed, reverse the straps for easier use.

Credit: www.amazon.com
Stitching And Reinforcing
Areas that take a lot of stress, like strap attachment points, need extra strength.
- Use a leather punch to make stitching holes.
- Sew by hand with a heavy-duty needle and thread, or use a leather sewing machine.
- Double-stitch around strap holes and the apron’s top edge for extra durability.
Many beginners skip reinforcing the straps, but this is a key area where homemade aprons fail. Taking the time to double-stitch will make your apron last much longer.
Finishing Touches
Small details can make a big difference in usability and comfort.
- Round off any sharp corners to prevent catching.
- Add a small pocket for holding soapstone or chalk.
- Smooth rough edges with sandpaper or a leather edge tool.
For extra comfort, some welders add a cotton liner to the neck strap. This prevents chafing during long work periods.
Credit: www.leatherbydragonfly.com
Care And Maintenance
A leather apron lasts for years with the right care.
- Wipe away sparks or spatter after each use.
- Apply a leather conditioner every few months to prevent cracking.
- Store the apron in a cool, dry place—leather can grow mold if left damp.
Never machine wash your apron. Spot clean with a damp cloth, and avoid harsh chemicals that could weaken the leather.
Common Mistakes To Avoid
- Using thin or poor-quality leather that won’t protect you from sparks.
- Cutting the apron too small—always measure twice.
- Skipping reinforcement on straps, leading to breakage.
- Making straps too short for comfortable movement.
- Forgetting to round sharp edges, which can snag on clothing.
A lot of new makers forget to test-fit the apron before attaching straps. Always check the fit before final assembly.
Frequently Asked Questions
How Thick Should Leather Be For A Welding Apron?
For most welding jobs, 6-7 oz leather (about 2.5 mm thick) is ideal. It gives good protection without being too stiff. Heavy-duty jobs may need thicker leather.
Can I Use Recycled Leather For A Welding Apron?
Yes, as long as the leather is thick and not cracked. Old jackets or furniture leather can work, but avoid any material that’s too thin or has been treated with flammable coatings.
What Is The Best Way To Clean A Leather Welding Apron?
Wipe off dust and debris with a dry or slightly damp cloth. For deep cleaning, use a small amount of saddle soap and let the apron air dry. Never soak or machine wash leather.
Are Rivets Better Than Sewing For Straps?
Both methods work, but rivets give extra strength, especially where straps meet the apron. If you sew, use heavy-duty thread and double-stitch for the best results.
Where Can I Buy Quality Leather For Welding Aprons?
You can find welding-grade leather at specialty craft stores, online retailers, or local leather suppliers. For more guidance, check out this leather overview.
Making your own leather welding apron gives you protection, pride, and a tool that fits your needs. Take your time, follow each step, and you’ll have a piece of safety gear you can trust for years to come.