
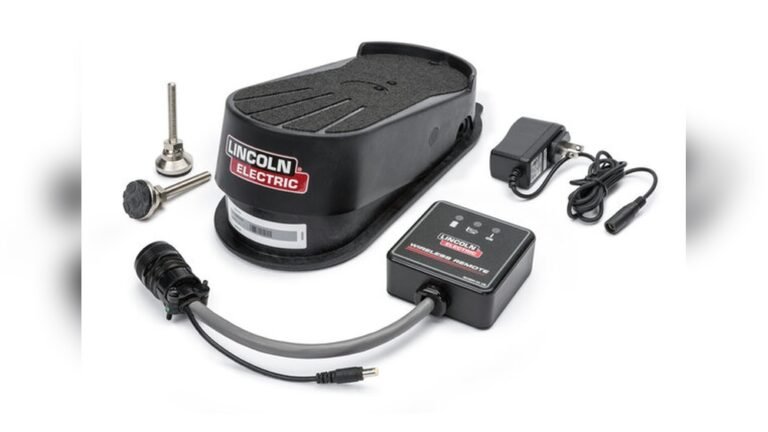
Understanding The Tig Welding Foot Pedal
The TIG welding foot pedal is a crucial tool for any TIG welder, whether you’re a beginner or a seasoned professional. It gives you precise control over your welding arc, allowing you to adjust the amperage (the amount of electrical current) on the fly. This control is essential for creating high-quality welds, especially on thin or delicate materials. Without a foot pedal, TIG welding would be far less versatile and much harder to master.
Think of it like the gas pedal in a car. You use it to control speed. The TIG foot pedal is your control for heat. By pressing down, you increase the amperage, leading to more heat and penetration. Releasing the pedal reduces the amperage, cooling the weld pool and preventing burn-through.
This dynamic control is what sets TIG welding apart and allows for such clean, precise results.
How A Tig Welding Foot Pedal Works
At its core, a TIG welding foot pedal is a variable resistor. When you press down on the pedal, you change the resistance in the circuit. This change in resistance directly affects the amount of amperage flowing from your welding machine to the TIG torch. Most pedals use a rheostat or a similar mechanism to achieve this variable resistance.
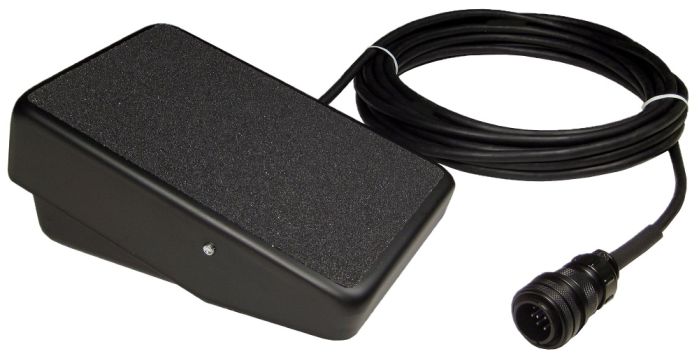
The pedal is connected to your TIG welder via a cable, typically a multi-pin connector. Inside the welder, this signal is interpreted, and the output amperage is adjusted accordingly. Some modern welders also allow you to set a maximum amperage limit on the machine itself, and the foot pedal will then control the current from zero up to that preset limit. This feature is invaluable for preventing accidental over-welding.
Credit: www.r-techwelding.co.uk
Key Features To Look For
When choosing a TIG welding foot pedal, several features can significantly impact your welding experience. Understanding these will help you make an informed decision.
Pedal Construction And Durability
The pedal needs to withstand the harsh environment of a welding shop. Look for pedals made from heavy-duty metal, like steel or aluminum. The pedal mechanism itself should feel robust and not flimsy. A non-slip surface on the pedal is also important to ensure your foot stays securely in place, especially during long welding sessions.
Cable Length And Connector Type
The length of the cable connecting the pedal to the welder is important for your workspace setup. A longer cable offers more flexibility, allowing you to position yourself comfortably away from the welding machine. Standard cable lengths are often around 12 to 25 feet, but longer options may be available.
The connector type is critical. TIG welders from different manufacturers, and even different models from the same manufacturer, can use different connector types. Always confirm that the pedal you are buying is compatible with your specific TIG welder model. Common connectors include 14-pin, 6-pin, and others.
Amperage Range And Responsiveness
The pedal should allow for a smooth and responsive control of amperage. This means that small movements of your foot should translate into proportional changes in the welding arc. A pedal with a wide amperage range, from low to high, is generally more versatile.
Additional Controls
Some advanced foot pedals include additional controls. These might include a preset amperage dial that sets the maximum current the pedal can deliver, or even a remote amperage control button that allows you to adjust amperage with your thumb while welding. These features can add convenience and precision.
Types Of Tig Welding Foot Pedals
While most TIG foot pedals function similarly, there are a few variations based on their control mechanism and features.
Standard Rheostat Pedals
These are the most common type. They use a rotary rheostat that is actuated by the pedal’s movement. As you press the pedal, the rheostat’s resistance changes, controlling the amperage. They are generally reliable and cost-effective.
Digital Amperage Control Pedals
Some newer machines and pedals offer digital control. While still operated by foot, the internal mechanism might be different, offering potentially more precise or repeatable amperage settings. These often come with more advanced features and can be more expensive.
“water-cooled” Vs. “air-cooled”
This distinction usually refers to the TIG torch, not the pedal itself. However, the amperage capacity of the pedal should match the capabilities of your welder and torch setup. High-amperage applications might require a welder and torch system that can handle the heat, and the pedal must be able to control that amperage range.
Why A Foot Pedal Is Essential For Tig Welding
The ability to control amperage dynamically is the cornerstone of TIG welding. Here’s why a foot pedal is indispensable:
- Precise Heat Control: This is the primary benefit. You can start the arc with a low amperage, increase it to establish a stable weld pool, and then reduce it as needed to prevent overheating or burn-through, especially on thin metals like aluminum or stainless steel.
- Arc Starting: Many pedals allow for a smooth arc start at a low amperage, reducing tungsten contamination and the need for high-frequency starts on some machines.
- Filler Metal Addition: As you add filler rod, you can slightly reduce amperage with the pedal to compensate for the added metal and maintain control over the weld pool.
- Stopping the Weld: You can gradually ease off the pedal to smoothly finish the weld, avoiding craters at the end.
- Versatility: A foot pedal makes TIG welding suitable for a much wider range of applications and materials, from intricate artwork to structural components.
Common Foot Pedal Problems And Troubleshooting
Even with durable components, TIG foot pedals can sometimes develop issues. Here are a few common problems and how to address them.
Intermittent Connection
If your amperage cuts in and out, it’s often due to a loose connection or a worn cable.
- Check the Cable: Inspect the entire length of the cable for any damage, kinks, or cuts.
- Inspect the Connector: Ensure the connector to the welder is clean and securely plugged in. Sometimes, dirt or debris can cause intermittent contact.
- Pedal Mechanism: The internal rheostat or potentiometer can wear out over time. If other checks fail, the pedal itself might need repair or replacement.
Pedal Not Responding
If the pedal has no effect on the amperage at all:
- Check Welder Settings: Ensure your TIG welder is set to use the foot pedal (some have a switch for torch or pedal control).
- Verify Compatibility: Double-check that the pedal connector is indeed compatible with your welder.
- Internal Fuse: Some welders have internal fuses related to the accessory ports. Consult your welder’s manual.
Amperage Stuck High Or Low
If the pedal is stuck at a certain amperage regardless of position:
- Mechanical Issue: The linkage inside the pedal might be jammed. Try gently wiggling the pedal to see if it frees up.
- Rheostat Failure: The variable resistor component has likely failed. This usually requires replacing the pedal.
Pro Tip: Always disconnect your TIG welder from the power source before inspecting or attempting any repairs on the foot pedal or its cable.

Credit: lincolnelectricretail.com
Choosing The Right Pedal For Your Welder
The most important factor when buying a TIG foot pedal is compatibility. Your pedal *must* be designed to work with your specific TIG welder model.
Manufacturer Specific Pedals
Many TIG welder manufacturers offer their own branded foot pedals. These are guaranteed to be compatible and often provide the best integration with the welder’s features. For example, a Miller foot pedal will work seamlessly with a Miller TIG welder.
Aftermarket Pedals
There are reputable aftermarket manufacturers that produce TIG foot pedals. These can sometimes be more affordable or offer features not found on OEM pedals. However, you must verify the connector type and compatibility before purchasing. Always check reviews and specifications carefully.
Amperage Rating
Ensure the pedal’s amperage rating meets or exceeds your TIG welder’s maximum output. While the pedal controls the amperage, it must be able to handle the electrical load.