Welding 1/8 inch steel with a stick welder (also called Shielded Metal Arc Welding or SMAW) can be simple, but only if you set the right amperage. Too little power and the rod sticks; too much and you burn through the metal. Getting the amperage right is key for strong, clean welds. Many beginners guess, but a smart welder understands why each setting matters. This guide will explain the best amperage range for 1/8 inch steel stick welding and cover 8 important factors you must consider. You’ll also find real examples, practical tables, and answers to common questions to help you weld with confidence.
Recommended Amperage For 1/8 Inch Steel
Most welders use 90 to 130 amps when stick welding 1/8 inch steel. The exact setting depends on your electrode type, welding position, and technique. As a rule, start near 110 amps for flat welds using a 1/8 inch rod. If your arc feels weak, bump up the amperage. If the metal burns through, dial it back.
Here’s a quick reference:
| Electrode Size | Steel Thickness | Recommended Amps |
|---|---|---|
| 1/8 inch | 1/8 inch | 90–130 A |
| 3/32 inch | Up to 1/8 inch | 70–100 A |
| 5/32 inch | 1/4 inch or more | 120–170 A |
8 Key Factors That Affect Amperage Choice
Welding is not just about turning a dial. Each of these 8 factors influences the amperage you need for 1/8 inch steel.
1. Electrode Type
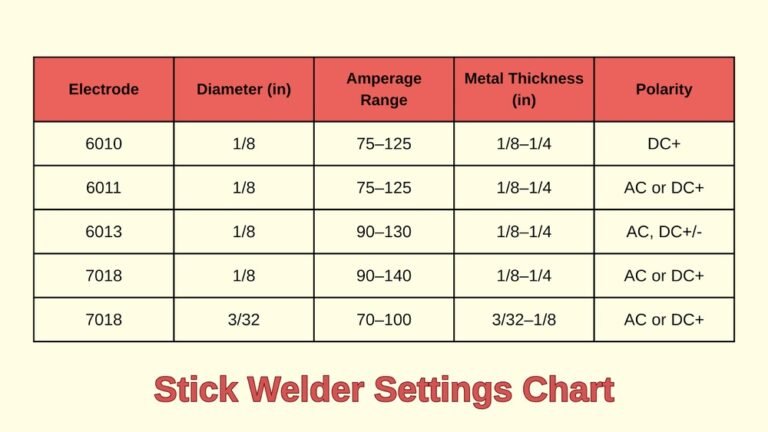
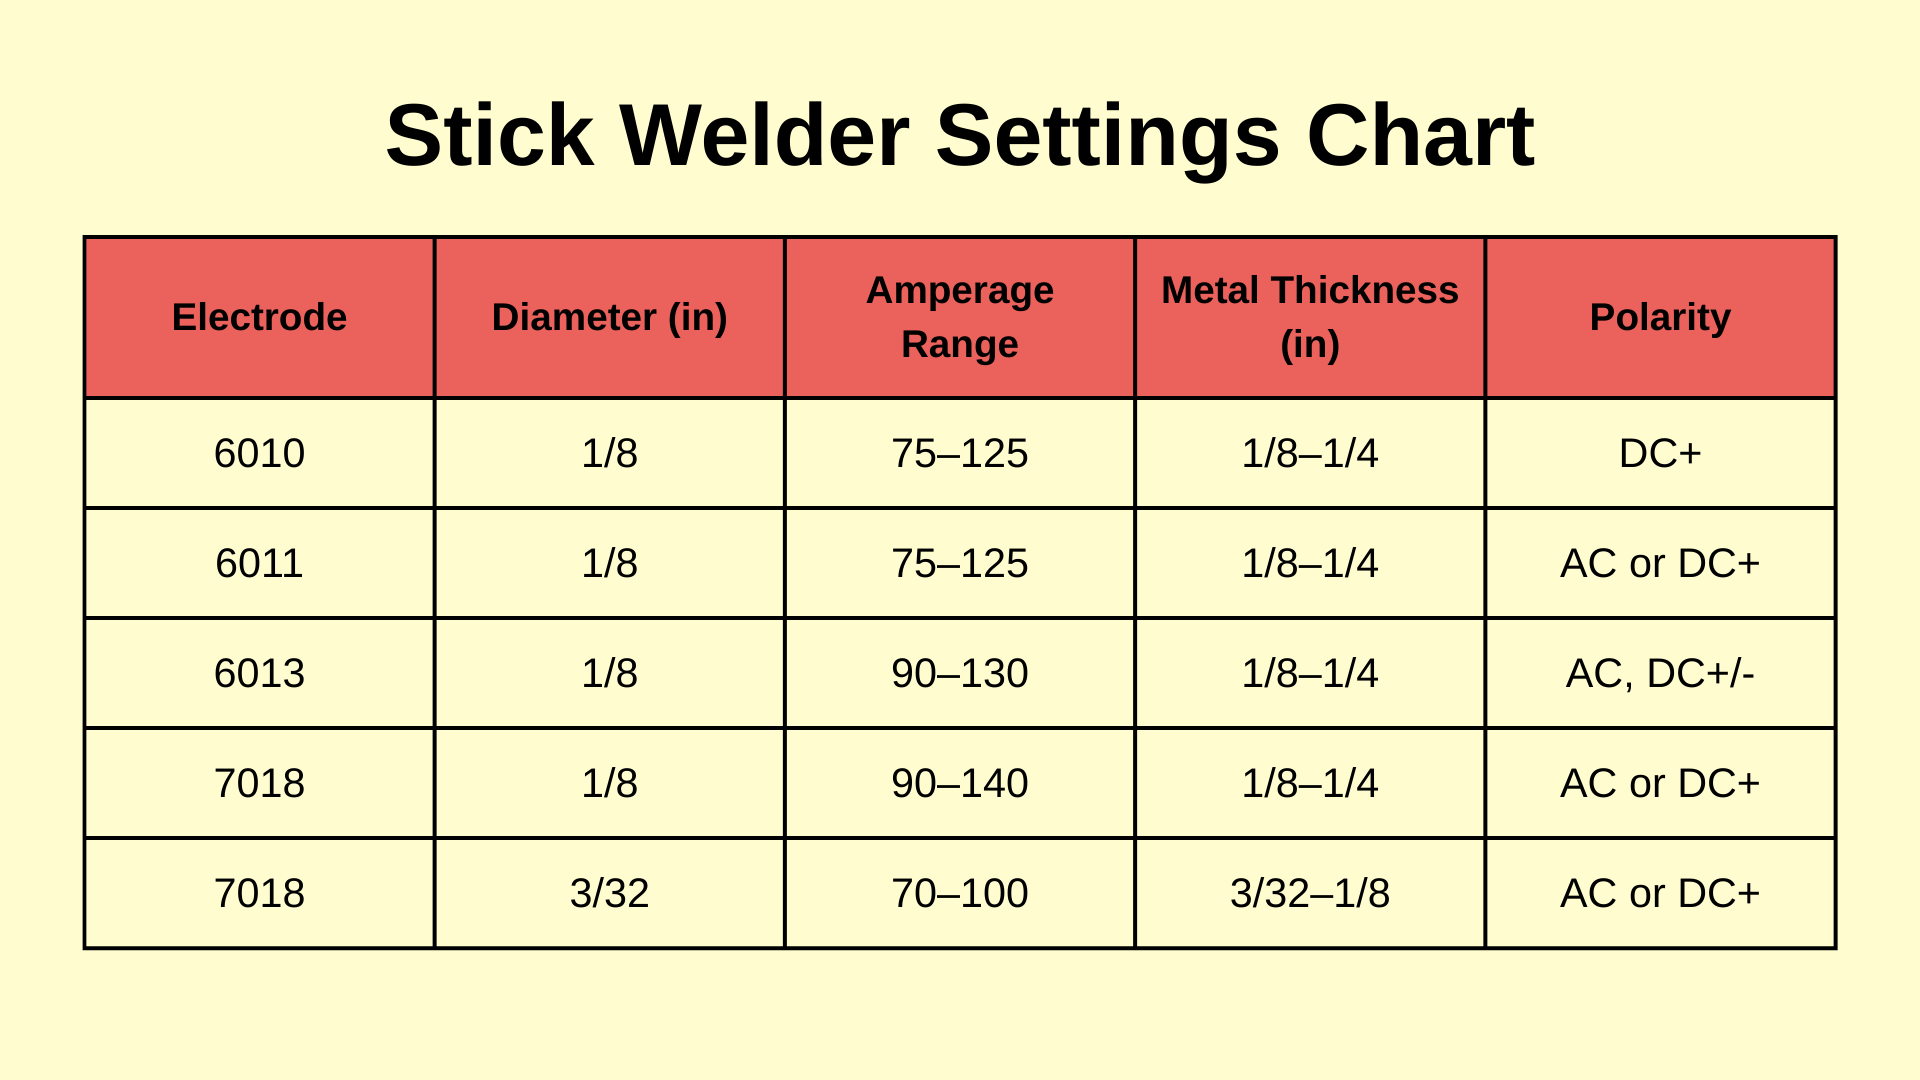
Different electrodes need different amperage. E6011 rods work well between 75–125 amps. E7018 rods prefer 90–130 amps. Always check the manufacturer’s instructions on the rod box—they know their product best.
2. Welding Position
Welding position changes the required heat. For overhead or vertical welds, use the lower end of the range (around 90–110 amps). This prevents the molten pool from dripping. For flat positions, you can go higher (110–130 amps) for deeper penetration.
3. Joint Fit-up
A tight fit between steel pieces allows lower amperage. If there’s a gap or poor fit, you’ll need a little more heat (amps) for good fusion. Avoid excessive gaps—they make control harder and increase the risk of burn-through.
4. Machine Type
Inverter welders deliver a more stable arc at lower amps compared to older transformer machines. If your machine is old, you might need to add 5–10 amps for the same result.
5. Metal Cleanliness
Dirty steel (rust, paint, oil) needs higher amperage for good penetration. But too much heat on clean steel can cause warping or holes. Clean your metal well for best results and more flexible amperage choices.
6. Electrode Condition
A damp or old rod can cause arc problems, even at the right amp setting. Use dry, fresh electrodes. Store rods in a sealed container or rod oven for consistent performance.
7. Welding Speed
Moving the rod slowly puts in more heat. If you weld fast, you may need to increase amperage to compensate. Try to keep a steady, moderate travel speed for best control.
8. Base Metal Composition
Not all steel is the same. Mild steel welds easier at standard settings. If your steel is high carbon or alloyed, you may need to adjust amperage and rod type. Always verify your material if you’re unsure.

Credit: www.youtube.com
How To Set Amperage Correctly
- Start with a test piece of the same thickness and steel type.
- Set the machine to the middle of the recommended range (e.g., 110 amps).
- Strike an arc and watch the puddle. If the rod sticks, turn up the amps. If it burns through, turn them down.
- Listen for a steady crackling sound—it means the arc is stable.
- Examine your weld bead. It should be smooth, not piled up or undercut.
Practical example: If you’re using a 1/8 inch E7018 rod on 1/8 inch mild steel, try 115 amps in the flat position. If you move to vertical, drop to 100 amps and adjust from there.
Common Mistakes To Avoid
- Running too cold: Causes poor penetration, weak welds, and rod sticking.
- Running too hot: Leads to burn-through, excessive spatter, and warping.
- Ignoring electrode specs: Always check the rod box for amp range.
- Not cleaning metal: Contaminants change how the arc behaves.
- Using the wrong rod: Choose the right rod for the steel and position.
Here’s a simple comparison:
| Mistake | Result | Prevention |
|---|---|---|
| Too Low Amps | Weak, uneven weld | Increase amperage gradually |
| Too High Amps | Burn-through, spatter | Lower amperage, faster travel |
Credit: www.arccaptain.com
Practical Tips For Better Results
- Clamp your work securely to avoid movement.
- Test your settings on scrap steel first.
- Keep your rod angle at about 15 degrees from vertical.
- Change rods if you see erratic arcs or excessive smoke.
- Don’t be afraid to adjust amps mid-weld if the conditions change.
Frequently Asked Questions
What Is The Best Amperage For 1/8 Inch E6011 Rods?
Most welders use 90–120 amps for 1/8 inch E6011 on 1/8 inch steel. Start at 105 amps and adjust as needed.
Can I Weld 1/8 Inch Steel With A 3/32 Inch Rod?
Yes, but you’ll need to use lower amperage, around 70–100 amps. The weld will be narrower and may need more passes for strength.
Why Does My Electrode Keep Sticking?
Too low amperage or moving too slowly can cause sticking. Increase your amps or travel speed, and be sure the rod is dry.
What Happens If I Use Too Much Amperage?
You risk burning through the steel, creating excess spatter, and producing weak, porous welds. Always stay within the recommended range.
Where Can I Find Official Amperage Charts?
The American Welding Society provides charts and safety info. You can also check Wikipedia’s SMAW article for more background.
Getting the amperage right for 1/8 inch steel stick welding takes a little practice and attention to detail. By considering these 8 factors and following the tips above, you’ll make strong, clean welds every time. Remember—test, adjust, and don’t rush the process.
With the right settings, even thin steel can be welded like a pro.

Credit: bakersgas.com